

In utility-scale and commercial solar power plants, ambient temperature, wind speed, solar radiation, and photovoltaic (PV) panel temperature directly dictate PR (Performance Ratio) calculations and energy output. A reliable solar panel weather station provides the critical ground-truth environmental data required for SCADA integration and remote performance optimization.
In this comprehensive guide, we demonstrate how to choose, connect, and deploy an integrated, solar-powered 4G meteorological station tailored specifically for modern PV plants.
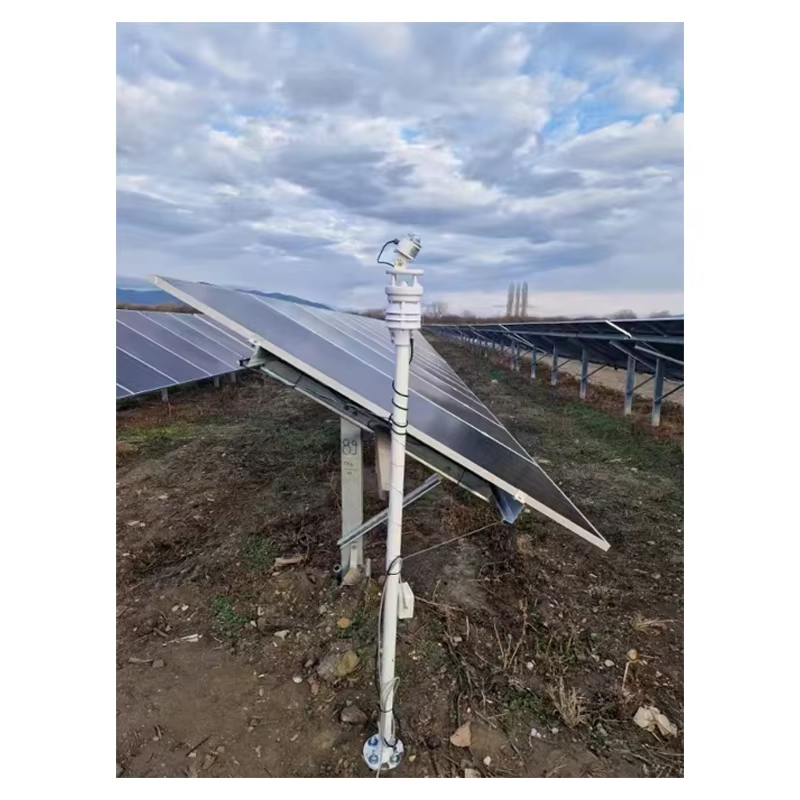
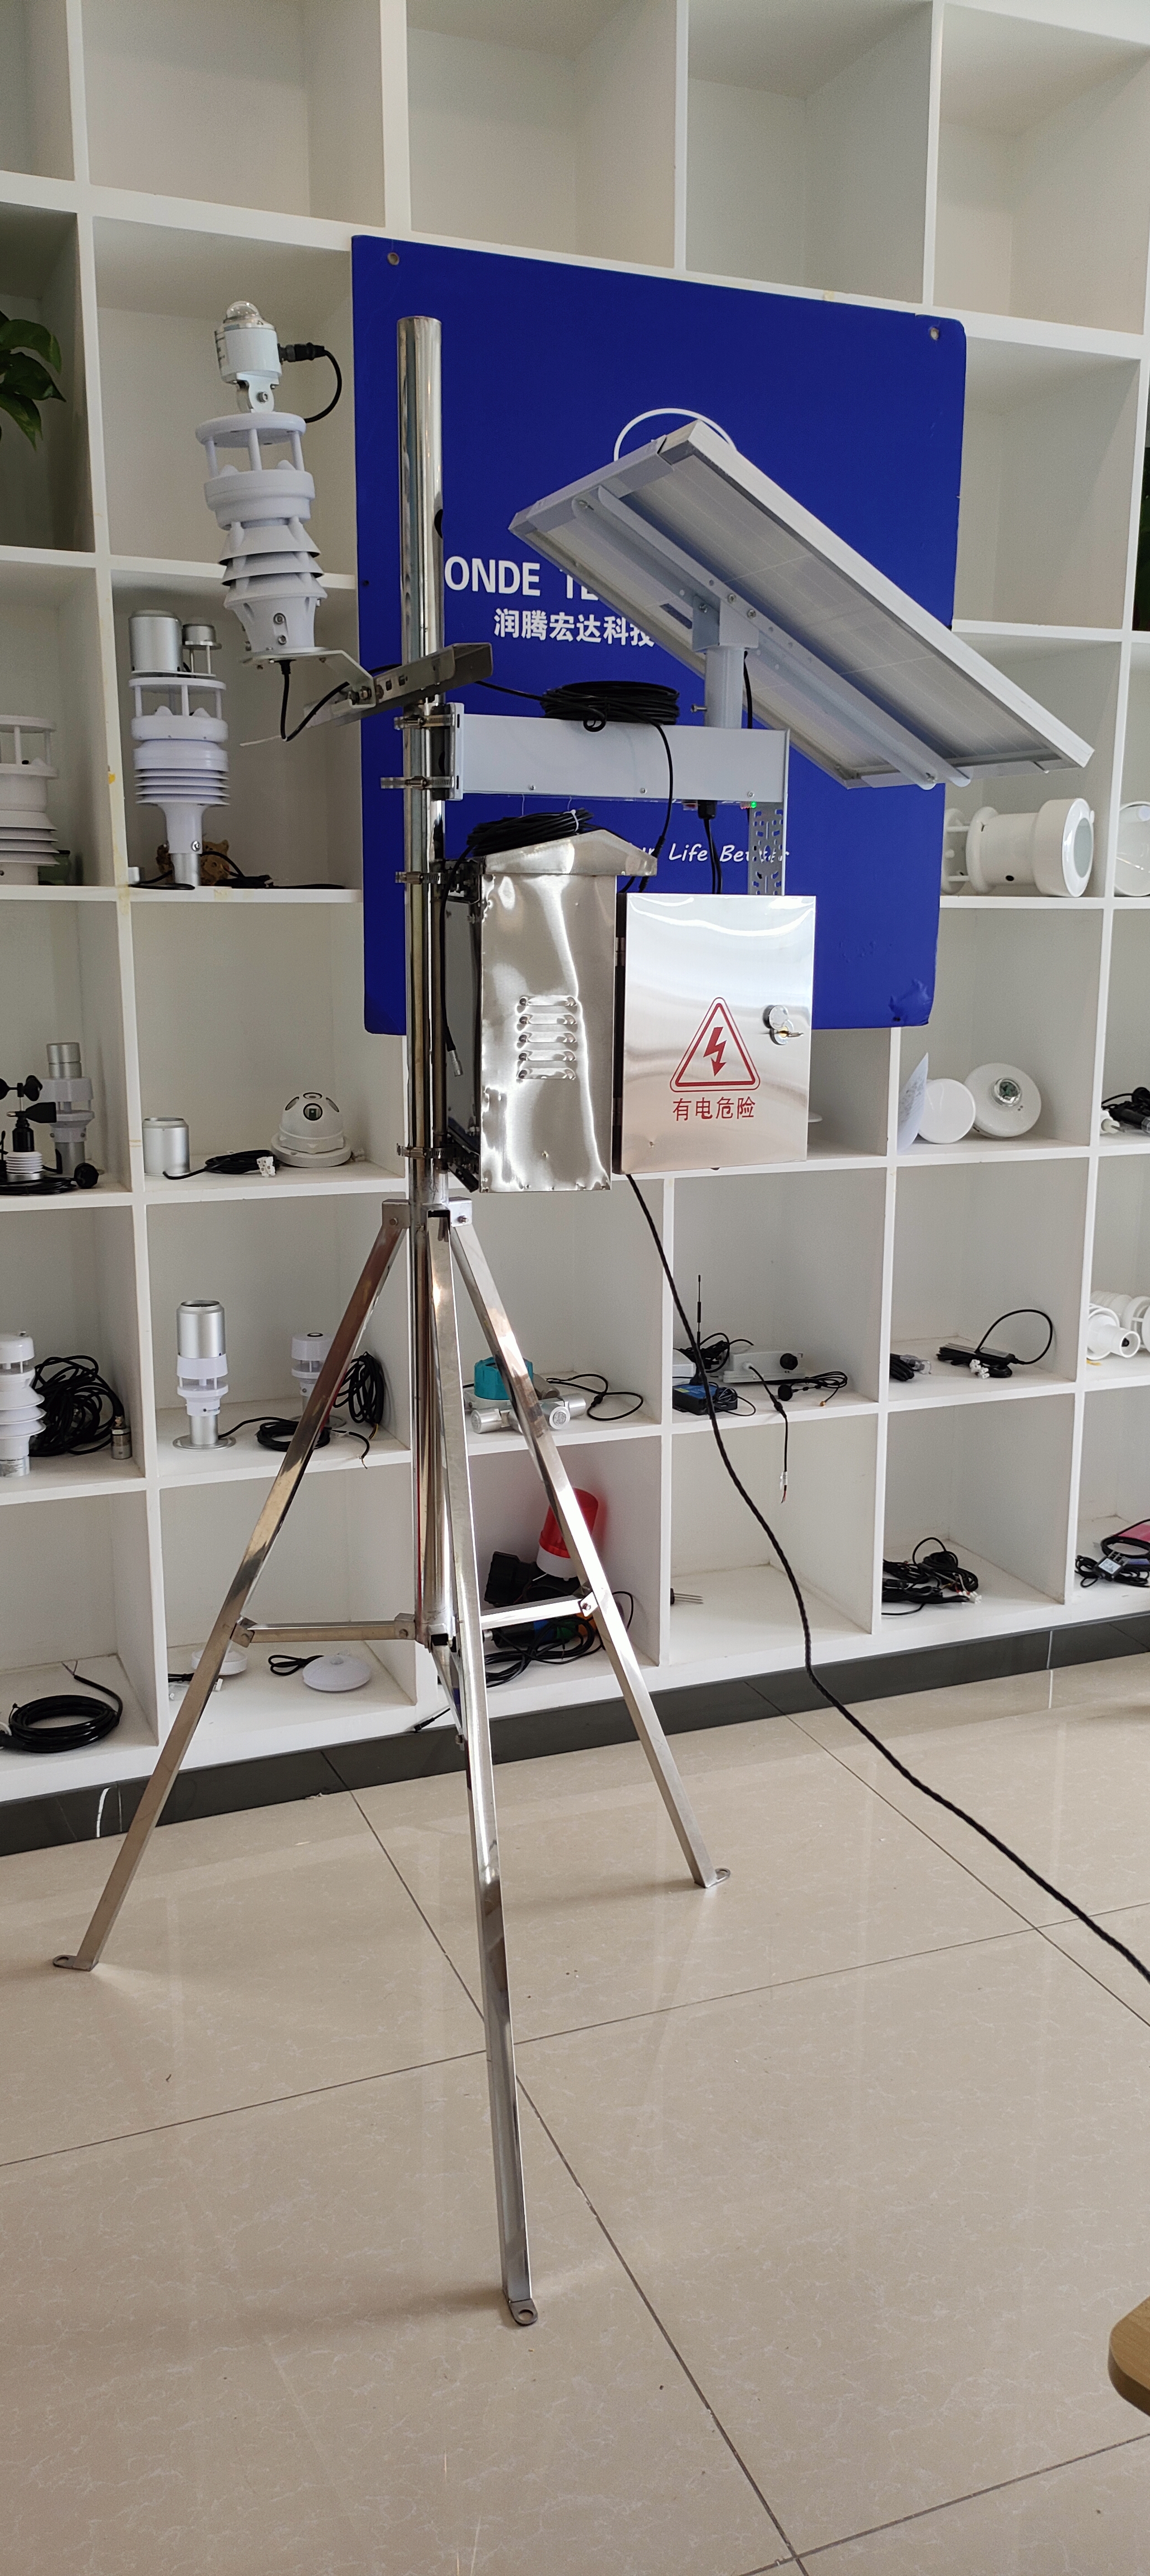
1. Core Components of a Solar Panel Weather Station (Entity Graph)
To ensure high-precision monitoring compliant with IEC standards, a professional PV monitoring meteorological system consists of six core physical and digital entities:
| Component | Technical Specification / Role | Function in PV Monitoring |
|---|---|---|
| Compact Weather Sensor | Ultrasonic Wind Speed/Direction, Air Temp, Humidity, Barometric Pressure | Captures macro-environmental conditions affecting convective cooling and mechanical load. |
| Total Solar Radiation Sensor | Pyranometer / High-precision Radiation Sensor (Horizontal Mount) | Measures Global Horizontal Irradiance (GHI) for baseline efficiency calculation. |
| PV Back-of-Module Temp Sensor | Surface-mount Temperature Sensor (Adheres to the rear of the PV module) | Tracks real-time panel operating temperature to calculate thermal loss coefficients. |
| Smart Wireless Transmitter (4G RTU) | Built-in 4G SIM Card Slot, Modbus RS485 Protocol, APN Configuration | Sends field sensor data to cloud/server software via wireless cellular network. |
| Solar Power & Battery System | Integrated Solar Panel with Built-in Lithium Battery, Waterproof Quick Connectors | Ensures 24/7 continuous off-grid operation with intelligent charge indicators. |
| Mounting Hardware & Pole Set | Tripod Stand, Crossbeams, Ring Clamps, Rain-proof Enclosures | Modular, dismountable structural support designed for rapid field assembly. |
2. Step-by-Step Field Installation and Deployment SOP
Proper installation directly impacts data accuracy. Based on 15+ years of meteorological equipment engineering experience at Honde Technology Co., Ltd., follow this four-step field setup protocol:
Step 1: Mounting and Aligning the Sensors
- 1 Compact Meteorological Sensor: Mount the integrated sensor at the top of the crossbeam. Adjust the radiation sensor angle to $45^\circ$ (or local optimal tilt) after removing the protective cover.
- 2 Total Radiation Meter: Install horizontal to the ground in an unshaded area to avoid structural obstruction.
- 3 Back-of-Module Temperature Sensor: Securely adhere the sensor flat onto the backside center of a representative PV panel.
Step 2: Cable Routing and Smart Transmitter Integration
- Route the sensor cables through the dedicated internal pole access holes to prevent weather degradation and cable exposure.
- Connect both the solar radiation sensor and the PV module temperature sensor to the intermediate Smart Transmitter.
- Fasten all connections using IP67-rated waterproof industrial connectors.
Step 3: Powering the System and 4G APN Setup
- Open the bottom cover of the 4G wireless RTU module, insert the local 4G SIM card into the slot, and verify the pre-configured APN settings.
- Plug in the waterproof solar battery connector and press the master switch button.
- Check the indicator LEDs: Green indicates active solar charging, while Red displays the current battery capacity status.
Step 4: Stand Pole Assembly and Cloud Server Connection
- Assemble the tripod base, main pole, and upper crossbeam using heavy-duty ring clamps.
- Once powered, the 4G RTU automatically establishes a handshake with the remote cloud server software.
- Log in to the IoT web platform using your designated credentials to view real-time meteorological data and sensor telemetry.
3. Real-World Engineering Insights (E-E-A-T Experience)
During long-term field operations across global solar farms, engineering teams frequently encounter three major deployment mistakes:
- 01 Incorrect Radiation Sensor Orientation: Placing a total radiation meter on an uneven beam causes skewed irradiance metrics, skewing PR calculations. Always use a bubble level during installation.
- 02 Unsecured PV Back Temperature Probes: Thermal tape degradation in high-heat environments causes probes to detach. Use high-temperature industrial adhesive and mechanical clips for long-term module contact.
- 03 Ignoring APN Pre-configuration: In remote off-grid solar farms, incorrect cellular APN configurations prevent cloud connectivity. Pre-configuring custom APN parameters before shipping saves hours of field troubleshooting.
4. System Operation Demonstration (Video Guide)
For a complete visual walkthrough of the unboxing, sensor wiring, 4G SIM insertion, and structural pole assembly, watch our step-by-step video demonstration:
-
Watch the Demonstration Video: Solar Panel Weather Station with 4G Server Software
5. Upgrade Your Solar PV Monitoring Infrastructure
Accurate weather data is the foundation of efficient solar power plant asset management. Honde Technology Co., Ltd. provides factory-direct, highly integrated solar weather monitoring solutions engineered for high durability and continuous off-grid reliability.
-
Explore Products & Solutions: Visit our official portal at www.hondetechco.com
-
Get Custom Quotations & Specifications: Contact our engineering team at info@hondetech.com for customized project solutions.
Post time: Jul-31-2026